
There is nothing like a good candle to warm up your home. They are one of the few home decor items that provide multi-functional use for a customer. They can be used to enhance the scent of your space, set a mood, or change the ambiance of a room. The value of candles has only risen in recent years. More small business owners and entrepreneurs are combining their innate creativity with versatile candle-making to build their brands and enhance their marketing.
Let’s Get Started
The DIY approach has continued to be popular with consumers establishing creative hobbies from home as more people are looking to invest in self-care. Glassnow is here to help you shop and prepare your candles with candle-making essentials like wax, wicks, and sourcing ingredients before getting started. Are you ready to dive into candle-making 101? Read more below.

Stock Up on Candle-Making Supplies
Before you can start creating your own candles, you’ll need to source ingredients from a local retailer or trusted vendor.
As a beginner, we recommend buying wholesale candle containers through companies like Glassnow that have different sizes, shapes, and color options to fit your vision.
Consider where you plan to store your candle and how the jar can reflect your personal aesthetic. Now it’s time to create the rest of your shopping list.
Candle-Making Supply Checklist:
Research is crucial when building your ideal candle, so there are no details that are too big or little to spare. One of the biggest candle-making mistakes is improper preparation.
This can lead to you lacking the essential components needed to make your candle-making operation a success.
You’ll need to stock up on:
- Dyes
- Oils
- Wicks
- Wax
You’ll need to buy physical supplies that you can use throughout your candle making process, such as:
- Vat
- Thermometer
- Candlewick trimmer
- Pouring pitcher
- Digital scale
Sourcing and managing your supplies is dependent on the purpose of your candles.
How To Prepare Wax For Candle-Making
While soy is the most popular wax, we’ve seen an increase in various candle wax types for candle making, such as soy, paraffin, beeswax, coconut, and blended wax.
Choosing the right wax affects how a candle burns and how well it captures your fragrance, so select a wax with those factors in mind.
Once you select your wax, arrange each of your candle containers in a sturdy area with a paper towel underneath to protect your surface. You can place a pot on low heat and melt your wax.
Always measure your wax using a thermometer to prevent it from burning.
Creating Candle Scents
The scent is everything when it comes to creating a candle.
You can stay organized with your selected fragrances by creating a candle scent calendar blog based on holidays, themes, and seasonal moments of the year.
One of the hallmarks of candle making is your fragrance, and essential oils are the scent staple to bring your candle to life.
You can combine your favorite scents with colors specific to your brand tone/aesthetic to transform your candle.
When your wax is melting, add your essential oils.
Experiment with the scent strength by increasing the number of essential oil droplets in the wax.
As you get more experienced, you can pair different scents together; we recommend sticking with a few classic scents until you get more confident in your candle-making efforts.
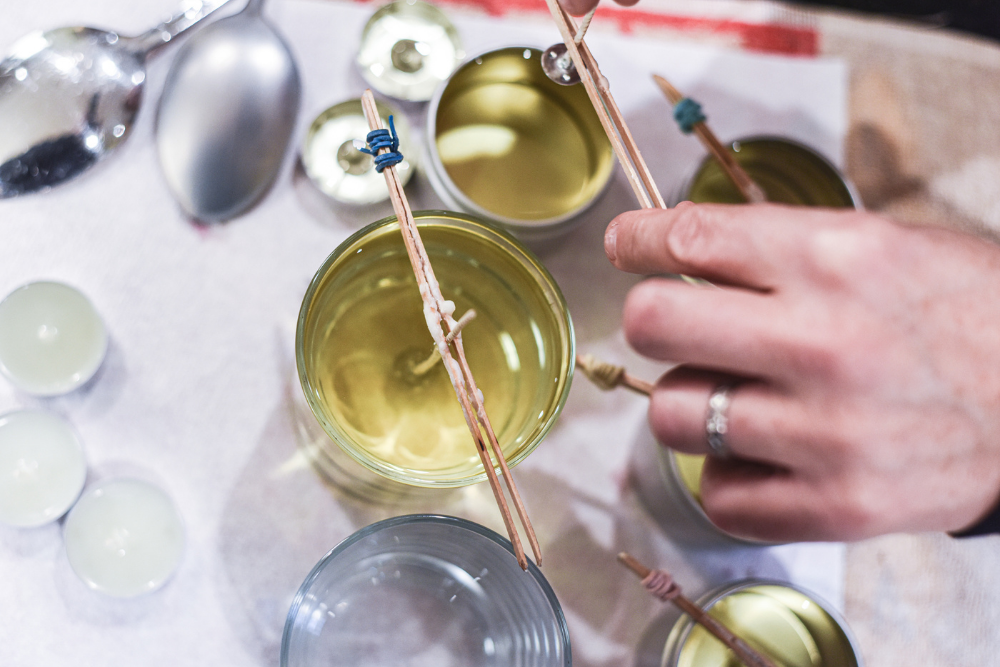
Candle Wick Preparation
Candle wicks should be selected based on factors like the type of candle container you are using, wax, and burn rate.
The most popular wick types are cotton, paper, and zinc, but they can also come in options like flat, square, cored, wooden, and specialty.
This may include some trial and error but you should always refer to the manufacturer’s recommended wax type and container to help guide your pairings.
Set your wick in the individual containers and add any decorative elements to the wax, such as dried flowers, wax molds, and charms, that can enhance the aesthetic of the candle. Make sure your wicks haven’t fallen to the side and are in the middle.
Don’t be afraid to add personality to your candles and experiment with festive elements within the wax.
Pouring The Candle Wax
Keeping the wicks steady can be the most challenging part of this process, so if you’re working solo, then we recommend using a clothespin or metal candle wick centering device to help keep the wick centered.
Once your wicks are set in place, it’s time to pour wax and wait for it to harden.
Now you can set your candles aside and wait for them to cool, which can take anywhere from 4-6 hours. After they harden, trim the wick to your desired length and apply the finishing touches.

Final Steps of Candle-Making
Once the candles are complete, it’s time to personalize and brand your containers. Add custom labels to your containers with creative typography and seals that will complete the finished look.
If you’re looking to market your candles for selling, there are a few options to consider. Take high-resolution photos that you can use on your eCommerce website & social media.
You also want to decide on the best avenue to market your candles and there are many options. Whether it’s social media, email, or an E-commerce website, you’ll want the avenue that can gain the best engagement and traffic for selling.
Conclusion
Now that we’ve laid out the steps, it’s time to get busy with candle-making made easy from your home. Glassnow provides 100% recyclable glass containers that come in dynamic, classic, and creative shapes to bring your candles to life. Candles will only continue to be in high demand as there continues to be a vested interest in their versatility in shape, size, and fragrance.
Get your entrepreneurial efforts off the ground and start creating candles that reflect your personality, interest, and unique desires of your target audience.
Shop all candle containers on our website!
